This guide is an extended appendix document for TP-Link Setup Guides, that can be found
https://support.aquiss.net/en/knowledgebase/category/tp-link-routersIt will steer you towards setting up and entering the
Internet VLAN ID on TP-Link Routers. The VLAN ID is sometimes needed in addition to your PPPoE login details when connecting your Aquiss broadband connection to certain networks/products that we offer.
Networks that require Internet VLAN IDs for PPPoEThe following networks require this additional setting when making a PPPoE connection. Without it, your Aquiss username/password will not complete its connection to the internet.
- CityFibre (VLAN ID is 911)
New Style Router InterfacesIf you have a new style TP-Link router (for models released 2024 onwards), you may be looking at a screen similar to the below image. You are in a position with newer routers to set the
Internet VLAN ID at any time, after you may have setup your PPPoE login details. To arrive at this option, simply follow the step as below:
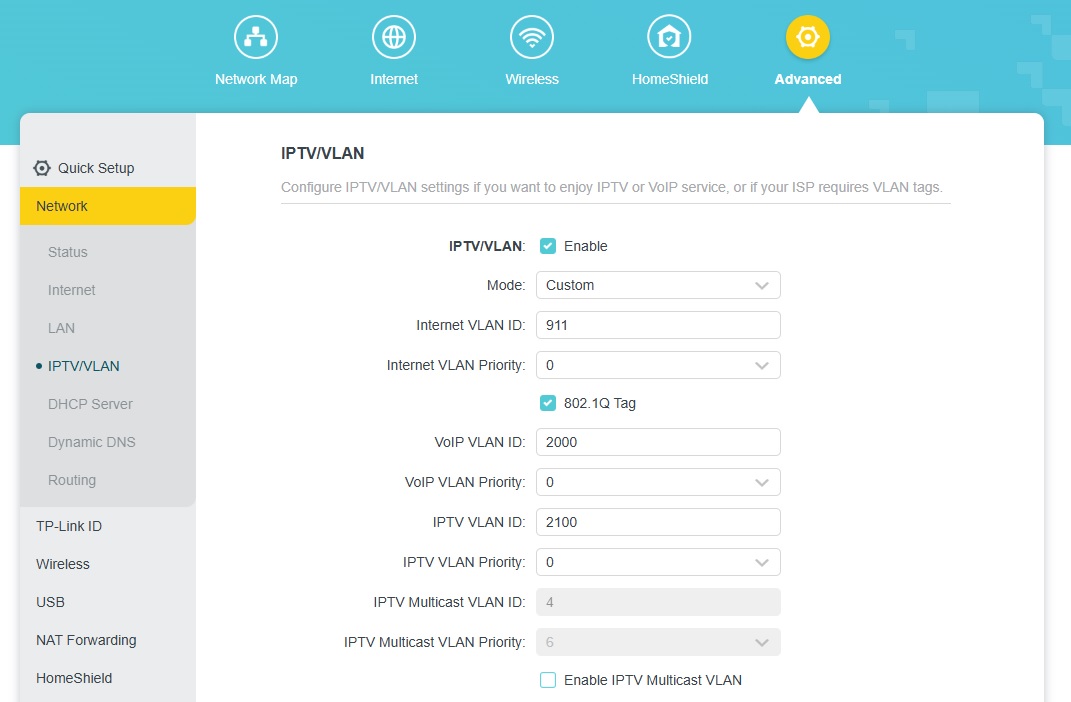
Advanced -> Network -> IPTV/VLAN- Enable (tick): IPTV/VLAN
- Mode: Custom
- Internet VLAN ID: 911
- Internet VLAN Priority: 0 (zero)
- Enable (tick): 802.1Q Tag
- VoIP VLAN ID: 2000
- VoIP VLAN Priority: 0
- IPTV VLAN ID: 2100
- IPTV VLAN Priority: 0
- Disable (untick): Enable IPTV Multicast VLAN
Old Style Router Interfaces (C & AX models)If you have a older style TP-Link router interface (for models released until the end of 2023), you may be looking at a screen similar to the below image. Setting up the
Internet VLAN ID needs to be performed correctly during a
Quick Setup process. At present, you can't alter this setting afterwards, so it's important to follow the setups below:
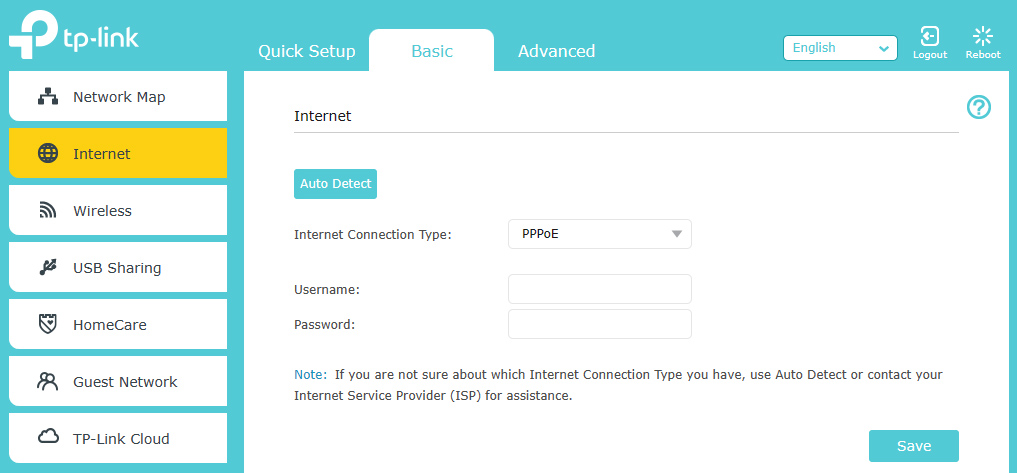
- Click: Quick Setup
- Select: PPPoE
- Click: Additional ISP Settings (this will open further options)
- Select ISP Profile: Custom & LAN1 to LAN4 set as Internet
- Click: NEXT
- Enter VLAN ID: 911
- Enter Internet Priority: 0 (zero)
- Enable (tick): 802.1Q Tag
- Enter IP-Phone VLAN: 2000
- Enter IPTV VLAN: 2100
Old Style Router Interfaces (VR models)If you are using an older VR model TP-Link (such as VR400, VR600 & VR900 etc), arguably these TP-Link routers have an interface that is easiest when it comes to adding the VLAN ID. As can be seen in the screenshot below, the VLAN Tag can be enabled and added on the Basic settings page.
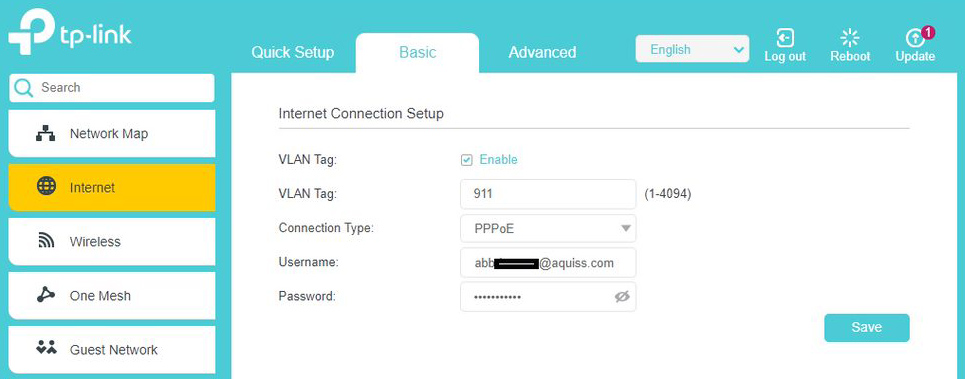 Basic -> Internet
- Enable (tick): VLAN Tag
- Enter VLAN Tag: 911
- Connection Type: PPPoE
- Enter Username/Password
Deco App InterfacesIf you are using TP-Link Deco units, these can also be setup to make an internet connection, which also support the ability to configure the
Internet VLAN ID. Following the guides and images below.
From the Deco App, please go to
More -> Advanced -> IPTV/VLAN.
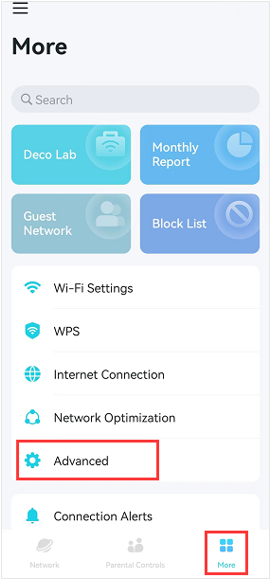
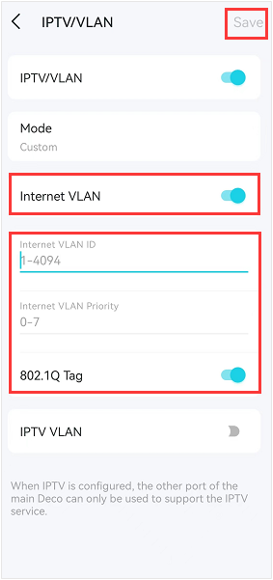
Enable IPTV/VLAN, and click on Mode. Select
Custom, then enter the following:
- Internet VLAN ID: 911
- Internet VLAN Priority: 0
- Enable (slider on): 802.1Q Tag
Click on Save to finish the setup process.