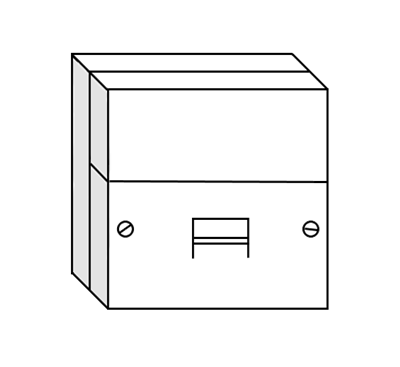
The BT line coming into your premises will terminate at the BT Master socket. However, BT will only guarantee a service, whether it is Broadband or Telephone, to the Master test socket. This socket can be found behind the front plastic cover of standard BT (NTE5) sockets (see illustrations below). This article will explain the importance of testing from the Master test socket and how to proceed in doing so.
Why test from the Master test socket?
All other sockets in your premises (if present) and even the plastic front cover of the Master socket is an extension from the Master test socket. These cables can get damaged over time through use or by accident. This can cause a loss of connection or intermittency on your line. Testing your connection from the Master test socket will eliminate the internal extension wiring as being the cause of a fault. This test forms an important diagnostic step that resolves the vast majority of connection problems.
Testing from the Master test socket:
Before attempting this test please ensure that the Master socket in your premises is a standard BT (NTE5) socket. The socket will have a horizontal split through the middle of the front plastic cover, with two screws on the bottom half as illustrated below.
 NOTE: Do not remove the screws if there is no horizontal line dividing the front plastic cover.

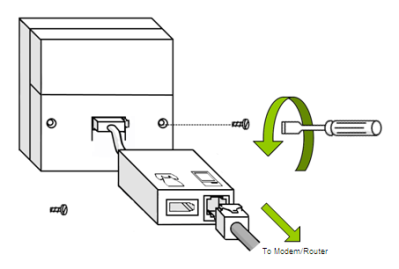
Remove the screws from the front plastic cover using a screw driver. Once the screws are removed, carefully pull the front plastic cover away from the rest of the socket. NOTE: The front plastic cover may not remove completely so should not be pulled away with excessive force.

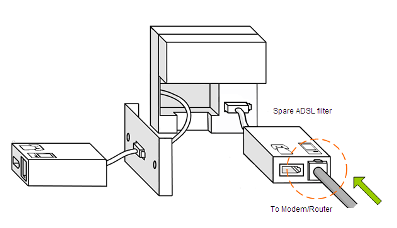
The Master test socket should now be visible on the right hand side of the socket. Plug in an alternative/spare ADSL filter to the Master socket and reconnect all Broadband equipment. Ensure all equipment is powered on and retest your connection to the Internet. For speed and intermittency faults you may need to monitor from several hours up to three days to confirm stability through the test socket.


